How to Fly a Drone for Beginners – An Easy Tutorial
Learning how to fly a drone can be complicated and confusing for a beginner. This tutorial will walk you through how to fly a drone for the first time and how to avoid common mistakes. Let’s make sure you don’t end up crashing your drone on it’s first flight.
Guidelines for Your First Drone Flight
There are two rules that must be stressed.
- Always remove the propellers when turning on the drone for any reason other than when it is ready to take off.
- Never handle a drone when its motors are armed or spinning.
Here are a few other tips that will helpful when you first learn how to fly a drone:
- 30-Foot Buffer – Keep a safe distance from your takeoff/landing location and the area that you intend to maneuver your drone.
- 10-Foot Minimum Altitude – Many RC pilots use the term “three mistakes high.” You want to operate at an altitude that will keep your drone safe in the event of an operator error incident, but not out of reach.
- Be Aware of Radio Interference – Depending on the radio system that your drone uses, you can encounter interference in certain locations. If your drone begins to show any odd behavior, immediately assess if there is an issue with radio interference. Avoid areas that have power lines and radio towers close by.
- Wind – Wind can significantly affect your first drone flight and those after. Try to learn how to fly a drone on a day with light wind and be aware of turbulence caused by nearby buildings and trees.
- Prop Guards – These accessories are a very good investment. Having a propeller damaged in flight can not only be an inconvenience, it can cause a crash. Prop guards are available for most drones even if they do not come with the drone initially.
Basic Aerodynamics and Control
We’ll keep this part of how to fly a drone simple. Drones fly thanks to a very complicated process involving electronic sensors, micro computers, gyroscopes, accelerometers, and radio waves. However, they are designed to be simple to operate and user friendly. Keep in mind, though, that a drone is a complicated system that requires knowledge and care to operate safely.
Simply, a drone takes off when the spinning propellers produce downward thrust that is more than the weight of the drone itself. More motor power means more thrust from a faster spinning propeller, and the faster the drone will climb. For a GPS or position sensor-equipped drone, the left stick typically stays in the center. Pulling it back decreases power and makes the drone descend. Pushing it forward increases power and will cause the drone to climb. Releasing the stick to the center will allow the drone to maintain the altitude it is at. The flight controller and sensors are doing the work of keeping the drone at the altitude you specified.
For a drone using a basic attitude or rate mode, the left stick will start at the bottom. Pushing it forward causes the motors to spin the propellers, generating thrust. The farther forward you push the stick, the more power the motors provide. Typically, a drone will not take off until the stick reaches the center position, or just beyond. Pulling the stick to the rear, behind the center, will make the drone descend. Making the drone go up and down is as simple as adding or subtracting power.
For maneuvering, a drone uses differential thrust. If your drone is in a stable hover and you want to go forward, you push the right stick forward. This will increase the power to the rear motors causing the drone to tilt forward. The drone will continue to tilt and move forward until you release the right stick to the center causing all of the motors to return to the same power output and the drone to a level altitude.
We call this tilting “pitch,” and it is controlled by moving the right stick forward and backwards. The same differential thrust occurs side to side as well in the “roll” axis. Moving the right stick left and right will cause the drone to move laterally left and right. The last axis is “yaw.” This is accomplished by using the torque of opposing motors to rotate the drone as if it were balanced on a pin. The control used for yaw is moving the left stick left and right.
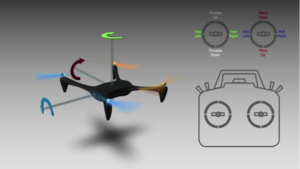
Each axis can be controlled individually, but to become an accomplished drone pilot you must learn to coordinate them together. Practice is required to hone these skills. Even with a drone that is GPS equipped, I recommended as you learn how to fly a drone to become familiar with how it flies when in attitude mode.
To learn more about what a drone is and the history for drones, check out this article.
Ready for Your First Drone Flight Takeoff
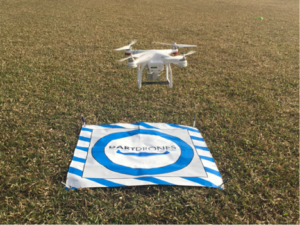
Find a large area, clear of obstacles and people. Start above grass as it can be more forgiving than a hard, concrete surface. It is always a good idea to use a portable landing pad, such as a piece of foam or cardboard, to decrease the amount of debris kicked up from the drone’s rotor wash.
Drones with GPS
If your drone is GPS equipped, it might have an automatic takeoff option. This will start the motors spinning and have the drone climb to a low altitude and maintain a hover. If you are performing a manual takeoff, start the motors using the required stick command, then push the left stick forward slightly until the drone lifts off of the ground and climbs to a safe altitude of a few feet. Once at your desired altitude, center the left stick to maintain a hover.
Drones Without GPS
If your drone does not have GPS or a positioning system, raise the left stick until the drone lifts off of the ground and begins to climb. Once at your desired altitude slightly pull back on the left stick to maintain a hover. You will have to make constant adjustments to maintain your altitude, so keep a close eye on your drone. Learning how to fly a drone is much easier with a GPS equipped drone.
Ground Effect
As you prepare for your first drone flight and learn how to fly a drone, now is also a good time to discuss ground effect. When the drone is close to the ground, the downward rotor wash hits the ground and causes turbulent air close to the surface. If the drone stays in this level of turbulent air it may have difficulty maintaining a stable hover. Make sure when taking off, climb straight up until you are able to hover several feet above the ground so that ground effect is avoided.
Now that you’ve gotten in the air, let’s keep learning how to fly a drone.
Forward and Back, Left and Right
The first maneuvering flight we are going to work on is moving the drone forward and backwards, and to the left and right.
Once you have taken off and the drone is in a stable hover, make sure your practice area is clear. We are first going to practice forward and backwards movement. During this exercise the drone will always face away from you. Push the right stick forward to make the drone move forward. The farther the stick moves, the faster the drone will fly. If your drone is GPS equipped, releasing the stick should stop the forward movement and maintain a stable hover. If your drone is attitude mode only you will have to pull back slightly to stop your forward movement and return to a hover. Now pull the right stick to the rear to have the drone return to you. Practice this a few times to get a feel for how your drone flies.
Return to your landing spot and now push the right stick to the left and right. The drone will fly side to side. Practice this as well a few times to get the hang of it.
Now that you are comfortable with forwards and backwards, left and right, let’s put it together to fly a square. Start from your landing spot and in a stable hover, push the right stick to the left and fly a few feet. Release the stick to return to a hover. Push the right stick forward to fly forward a few feet, releasing the stick again when you are ready. Push the right stick to the right before releasing it. Try to be in line with your takeoff/landing spot when you stop. Lastly, pull the right stick to the rear and have the drone back up and return to the takeoff/landing spot. Practice this by starting the square both to the left and right, and try to minimize the time you stop at each corner.
Congrats! You’ve just passed your next milestone of maneuvering your drone in a square. Now it is time to increase the challenge.
Staying Oriented
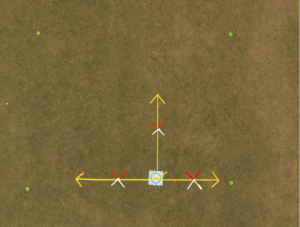
As we discussed, many pilots crash because of a loss of orientation when learning how to fly a drone. It can take a significant amount of practice
before you are comfortable when flying your drone, and it is not facing away from you. It can be difficult to distinguish the front and back of your drone as most are mostly symmetrical all the way around. A good way for new pilots is to mark the front arms with some colored tape, or purchase prop guards with a different color for the front of the drone. This will make it much easier to tell which end is forward.
For this exercise we are going to go back to the forwards and backwards, left and right. The difference is that we are going to point the front of the aircraft in different directions while performing the exercise.
Start as before over your takeoff/landing point in a stable hover. Push the left stick to the left. The drone will spin in place to the
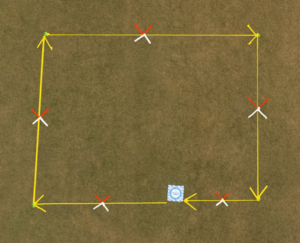
left. This is the yaw control. Now that the drone is facing to the left, perform the same practice maneuvers as before. The difference is that now the right stick, instead of pushing forward or backwards to make the drone fly towards or away from you, the right stick will be moved left and right to perform the same function. You are now using the roll control to move forward and away from you. Moving left and right of your position will now be done by moving the right stick, or pitch control, forwards and backwards. Practice this movement for a while before returning your drone over the takeoff/landing point. Use the left stick again to turn the nose of the drone to the right. Repeat the same exercise until you are comfortable with the movement.
Return your drone to the takeoff/landing location and use the left stick to point the nose of the drone directly at you. This is known as “nose-in” hovering. The functions of the right stick have somewhat returned to normal where pushing forwards and backwards will make the drone fly toward or away from you, and pushing left and right will make the drone move left and right, however, the controls are now reversed! As before, take your time and practice the same forwards and backwards, left and right exercise to become comfortable with this change of orientation. Once you are ready, use the left stick to turn the drone away from you again and return to the takeoff/landing spot in a stable hover. Now we are going to put these motions together in a square pattern.
From the takeoff/landing spot, use the left stick to turn the nose of the drone to the left. Now push forward on the right stick to cause the drone to fly forward a few feet before stopping. Now use the left stick to turn the nose of the drone away from you. Push the right stick forward to fly away from you a few feet. Left stick again to turn to the right before pushing the right stick forward to fly until you are back in line with your takeoff/landing spot. Use the left stick to turn the nose of the drone directly towards the takeoff/landing spot. Push forward on the right stick to fly to the takeoff/landing spot and return to a stable hover once you reach it.
As with the first square exercise, practice this starting off both to the left and right. Try and keep the square side as equal as you can. If at any time you lose orientation, use the left stick to turn the drone until it faces away from you and return it to your desired position. Learning orientation and muscle memory is a skill that takes dedicated practice to master. Take your time during this stage as it is the most important skill that you will need to safely fly your drone.
How To Fly a Drone for Beginners: Getting Coordinated
Up to this stage you have been using one control at a time to maneuver your drone. To be an accomplished drone pilot, you must learn to use all of the controls together, throttle/pitch/roll/yaw in a coordinated manner.
Fly at a slow speed when learning these maneuvers. This will make it easier to add corrections without losing control.
We are going to go back to the second square exercise where you were turning the drone at each corner using the left stick yaw control. Our goal is to start rounding off the corners of the square and work towards flying a circle in with a coordinated turn. For a coordinated turn we want to have the nose of the drone constantly pointing in the direction of travel. But since the drone is turning, the direction of forward flight is constantly changing. We are going to use the left stick yaw control in coordination with the right stick pitch and roll control to accomplish this. Let’s start with a right-hand square pattern. Start by rounding out the corners slowly, then work your way to wider turns.
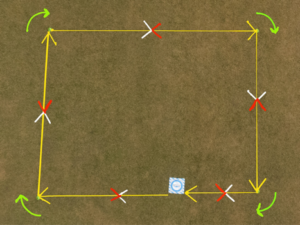
When approaching the corner of your square you will be pushing forward on the right stick to move forward. To begin the turn you will move both the left and right sticks to the right at the same time. You will see the drones nose begin to turn to the right while it also rolls to the right. This is similar to how it looks when an airplane performs a coordinated turn. Continue to hold the left and right stick to the right until you are ready to stop the turn. Slowly return both the left and right sticks to the center but continue to push forward on the right stick so that you are still flying forward. Continue to the next corner of your square and repeat the same procedure.
The goal is to eventually round the corners of the square off to the point that you are now flying a constant circle with the nose of the drone always pointing in the direction of flight. Make sure to practice this maneuver to both the left and right. After some practice, you should be able to make a complete circle in a constant run.
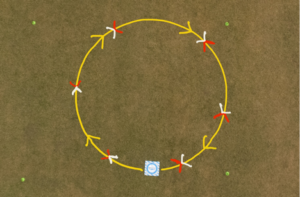
Learning to make coordinated flight is a major milestone and you should be very proud of your accomplishment. You’re mastering how to fly a drone. Let’s take one final step.
How To Fly a Drone for Beginners: Figuring Out the 8’s
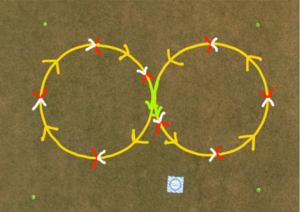
To challenge yourself further you will put together two 360 degree coordinated turns in opposite directions to fly a figure 8. These turns will be exactly like you practiced earlier in one direction at a time, and should have a good handle on. To fly this maneuver you will begin flying a circle, let’s start to the left. Once the drone reaches the point in the turn where it is facing you, move both the left and right sticks from the left side to the right side. This will change the direction of the turn from left to right. The goal is to have two equal sized circles directly next to each other. As you practice and advance your circles will become more round, of equal size, and you can accomplish a smooth transition from turn to turn. The “8” can also be done with the circles to the left and right of you, but also towards and away from you.
Mistakes Happen
Learning how to fly a drone for beginners can be fun. But it’s not without complications. As you can tell, there is a lot that goes into operating your drone beyond turning on a transmitter and hooking up the battery. Here are a few mistakes commonly seen in new pilots who are learning how to fly a drone for beginners:
- Not knowing or following the laws and regulations
- Loss of signal
- Fly aways
- Running out of battery power
- Forgetting equipment
- Poor judgment
- Incorrectly setting up your drone
- Not updating firmware
- Flying too fast
- Flying too high
- Panic when encountering an unexpected control response
Crashes happen, but it important to do everything possible to avoid them. All of these factors are easily eliminated by taking the time to learn about theses topics and practice flying your drone in small steps.
The Bird is Definitely Out of the Nest
By this time, you have gained quite a bit of knowledge and skill associated with how to fly a drone.
Typically your practice sessions are more limited by how many batteries that you brought rather than getting tired of flying. And as with manned aircraft flying, always be learning. You’re learning how to fly a drone as a beginner, but good pilots never stop learning. Use the internet to research different flying techniques and information, read industry magazines to keep c
urrent, and take in-person drone training classes to hone your skills. Also, if you plan to fly for commercial purposes, you will need to get a drone license by taking the Part 107 Airman Knowledge Exam. The technology that has been developed in the past few years has been incredible, and is getting better every day. Fly smart, fly safe.
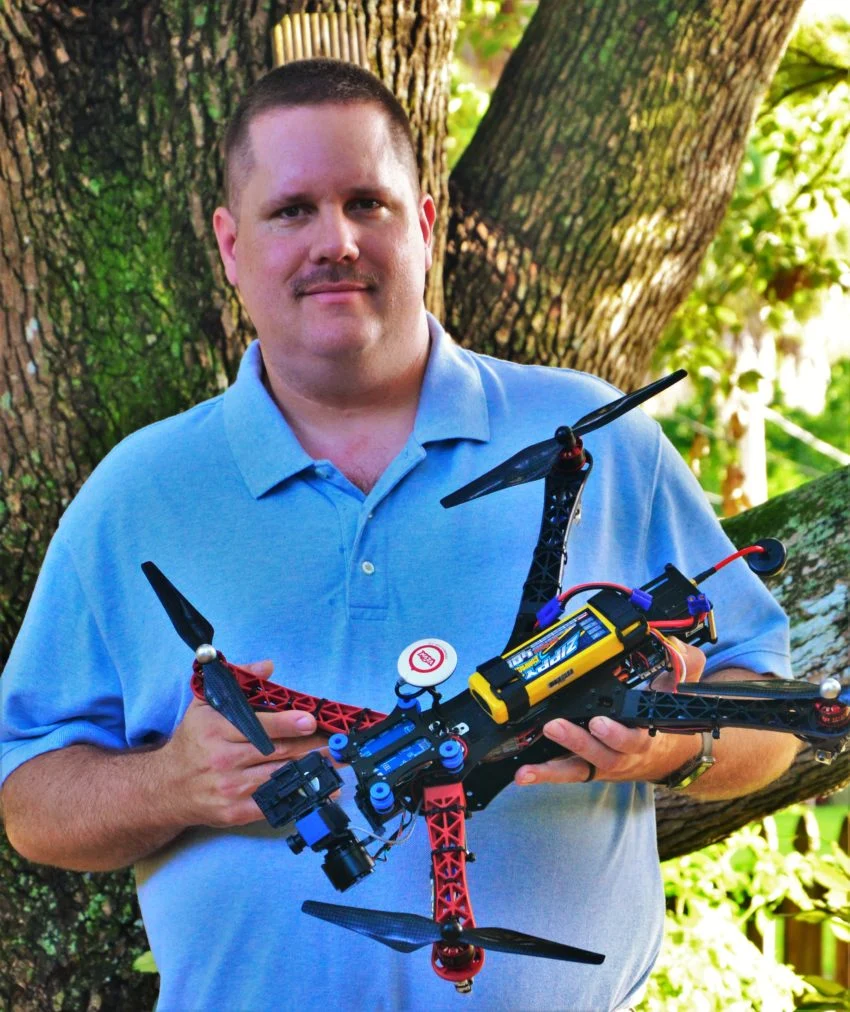
Mike Uleski has been a pilot since he was 18 and is a patrol division sergeant with a public safety department in Daytona Beach, Florida. Mike wrote this post about how to fly a drone.
